The Floor System
Four layers, one crew day — and the prep standards that make it hold.
Request the System Data SheetsPolyurea and Polyaspartic vs. Epoxy
Epoxy is not a bad product. It is a product with three specific limitations that show up in exactly the places floor customers look.
It ambers. Epoxy is not UV stable. Any part of a floor that sees daylight — the strip inside a garage door, a bay with skylights, a showroom near glass — turns yellow. The customer notices, and the only fix is recoating.
It is rigid. Epoxy has minimal elongation. Concrete moves seasonally, and hairline movement in the slab telegraphs straight through a rigid film as a crack in the finish.
It is slow and temperature-limited. Long recoat windows mean multiple mobilizations, and below roughly 55°F cure times stretch to the point where the job is not practical.
Polyurea and polyaspartic chemistry addresses all three: UV-stable topcoats that do not yellow, elongation that bridges hairline slab movement, and cure speeds that let a floor go down in a single day and install in cold conditions. The trade-off is a shorter working time — these products do not forgive a disorganized crew, which is why we spend time on process, not just product.
Layer 1 — Preparation
Every floor failure worth investigating turns out to be a preparation failure. There is no product in this catalog that fixes bad prep.
Profile mechanically to CSP 3–5. Diamond grinding for most interior floors, shot blasting for large or heavily contaminated areas. Acid etching does not produce a usable profile — it produces a clean surface with nothing for the coating to grip and a residue that has to be neutralized.
Test moisture vapor emission. Slabs on grade without a working vapor barrier push moisture continuously. Coat over it and hydrostatic pressure will lift the system in sheets months later.
Degrease first on contaminated slabs. Shop and service bay floors have oil driven deep into the concrete. Super Orange Cleaner before grinding, not instead of it.
Spec: CSP 3–5 mechanical profile · moisture vapor emission tested · fully vacuumed · edges and toe kicks ground, not just the open field.
Layer 2 — Repair with Concrete Mender
Cracks, spalled control joints, and popouts have to be dealt with before the basecoat, because a coating will not hide a moving defect — it will outline it.
Concrete Mender penetrates into the crack network and cures inside the concrete matrix rather than sitting on top as a patch with a debondable perimeter. Once cured it grinds flush and accepts coating exactly like the surrounding slab.
On residential garages this is typically a twenty-minute step. On warehouse and plant floors it is often the reason the job is winnable at all, because the alternative the customer was quoted was a partial repour.
Spec: open the defect to sound concrete, vacuum clean, apply Concrete Mender, allow cure, grind flush, then profile and coat as one surface.
Layers 3 & 4 — Basecoat, Broadcast, Topcoat
OR-621 basecoat is the bond and build layer. It goes down over the prepped slab and, on decorative floors, receives the flake or quartz broadcast while still wet.
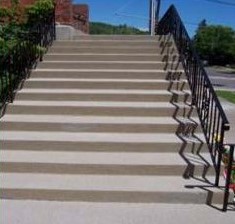
Broadcast is what makes a garage floor look like the photos. Vinyl flake blended to the customer's color, broadcast to rejection so no basecoat shows through, then scraped and vacuumed once cured. Quartz is the industrial equivalent where a heavier, more aggressive texture is wanted.
OR-55 topcoat locks in the broadcast and becomes the wear surface. UV-stable so it will not amber, chemically resistant against automotive fluids, road salt, and cleaning chemicals. Clear or pigmented, with a non-slip additive where the environment calls for it.
Spec: OR-621 basecoat at the system rate · flake or quartz to rejection · scrape and vacuum after cure · OR-55 topcoat, clear or pigmented, non-slip additive in wet areas.
System Specification
| Property | Value |
|---|---|
| Basecoat | OR-621 |
| Topcoat | OR-55 (alternate: OR-75DCL) |
| Build component | OR-ACR-42 |
| Epoxy tie-coat option | OR-E41 |
| Multi-surface primer | 7001 Primer |
| Structural repair | Concrete Mender |
| Degreaser | Super Orange Cleaner |
| Required profile | CSP 3–5, mechanically achieved |
| Moisture requirement | Moisture vapor emission tested before coating |
| Decorative options | Vinyl flake or quartz broadcast, custom blends |
| Slip resistance | Aggregate additive in topcoat where specified |
| UV stability | OR-55 topcoat does not amber |
| Typical install | Single day, residential and light commercial |
| Return to service | Foot traffic next day, vehicles shortly after |
| Coverage basis | 1,604 mil-sq-ft per gallon at 100% solids |
Equipment a Floor Crew Actually Needs
Unlike the sprayed polyurea products in the wider Oak Ridge line, the floor system does not require a plural-component proportioner. What it does require is real preparation equipment, and this is where new crews under-invest.
- Planetary diamond grinder sized to your typical floor, plus a hand edger for perimeters and toe kicks
- HEPA dust extractor matched to the grinder — silica dust control is not optional on an occupied site
- Shot blaster for large commercial and industrial areas where grinding is too slow
- Squeegees, rollers, spiked shoes, and enough of them that nobody is cleaning a tool mid-pour
- Moisture test kits and a concrete profile comparator
- Mixing equipment and timers — with fast-cure chemistry, batch discipline is what separates a clean floor from a ruined one
If you are building a floor crew from scratch, talk to us before you buy the grinder. Sizing it wrong is the most expensive mistake in the startup.
Want the Full System Documentation?
Technical data sheets, safety data sheets, coverage tables, and the step-by-step install guide.
Request DocumentationGet Floor System Pricing
Tell us about your project and we will follow up with product details, technical data sheets, and pricing.